@GregAlexandre
Hi, thank you for reporting this. It has been fixed.
Let us know if you still encounter issues.
Posts
-
RE: "Copilot" path not embedded in Edge
-
Battle-net - Custom Software removal
Because the Battle.net uninstall string does not support silent parameters, we created a PowerShell script that removes the application completely, including any leftover files and registry entries.
1. Save the removal script as a .ps1 file, for example
remove-battlenet.ps1$processNames = @("Agent", "Battle.net") $pathsToRemove = @( "$env:LocalAppData\Battle.net", "$env:LocalAppData\Blizzard Entertainment", "$env:AppData\Battle.net", "$env:ProgramData\Battle.net", "${env:ProgramFiles(x86)}\Battle.net", "$env:ALLUSERSPROFILE\Microsoft\Windows\Start Menu\Programs\Battle.net*", "$env:PUBLIC\Desktop\Battle.net.lnk" ) $registryPaths = @( "HKLM:\SOFTWARE\Wow6432Node\Microsoft\Windows\CurrentVersion\Uninstall\Battle.net" ) function Test-BattleNetPresent { foreach ($proc in $processNames) { if (Get-Process -Name $proc -ErrorAction SilentlyContinue) { return $true } } foreach ($path in $pathsToRemove) { if (Test-Path $path) { return $true } } foreach ($regPath in $registryPaths) { if (Test-Path $regPath) { return $true } } return $false } function Remove-PathIfExists { param ( [string]$Path ) if (Test-Path $Path) { Remove-Item $Path -Recurse -Force -ErrorAction SilentlyContinue Write-Host "Removed: $Path" } else { Write-Host "Not found: $Path" } } function Remove-RegistryIfExists { param ( [string]$RegistryPath ) if (Test-Path $RegistryPath) { Remove-Item $RegistryPath -Recurse -Force -ErrorAction SilentlyContinue Write-Host "Removed registry key: $RegistryPath" } else { Write-Host "Registry key not found: $RegistryPath" } } if (-not (Test-BattleNetPresent)) { Write-Host "Battle.net is not installed or no related files were found. Nothing to do." exit 0 } Write-Host "Battle.net detected. Starting cleanup..." foreach ($proc in $processNames) { $running = Get-Process -Name $proc -ErrorAction SilentlyContinue if ($running) { Stop-Process -Name $proc -Force -ErrorAction SilentlyContinue Write-Host "Stopped process: $proc" } else { Write-Host "Process not running: $proc" } } foreach ($path in $pathsToRemove) { Remove-PathIfExists -Path $path } foreach ($regPath in $registryPaths) { Remove-RegistryIfExists -RegistryPath $regPath } Write-Host "Cleanup complete." exit 0This PowerShell script:
- stops Battle.net-related processes if they are running
- checks whether Battle.net or related leftovers exist
- removes known Battle.net folders
- removes Start Menu and Desktop shortcuts
- removes the uninstall registry key
- exits cleanly if nothing is found
2. Create a tag for Battle.net hosts
For easier targeting, you can create a dedicated tag for hosts with Battle.net installed
https://corporate.vulndetect.com/#/tags

3. Filter hosts from the Applications page
From the Applications page, filter the hosts with Battle.net installed and assign the tag to them.
https://corporate.vulndetect.com/#/applications4. Create the Custom Software deployment
Create the custom configuration and upload the removal script as a
.ps1file
https://corporate.vulndetect.com/#/deployment/custom-create-job

5. Deploy the Custom Deployment Job to the target tag

Run a manual inspection after deployment if you want the results to appear immediately. -
Adobe Creative Cloud suite - Install, Upgrade
Adobe Creative Cloud Custom Patching Now Available via Custom Tag Approvals
We’re happy to announce that custom patching for Adobe Creative Cloud is now supported through Tag Approvals.
This allows you to deploy and update Adobe Creative Cloud and Adobe Creative Cloud applications using the official deployment packages generated in the Adobe Admin Console:
https://helpx.adobe.com/enterprise/using/admin-console.htmlRequirement:
Creating deployment packages from the Adobe Admin Console requires an Adobe Enterprise license. Once created, upload the customized Adobe ZIP package directly into the Custom Tag Approval to manage installations and updates across hosts.Example: Custom Tag Approval

How to use this feature
1. Create a package in the Adobe Admin Console using your Enterprise license. The Adobe deployment ZIP package will automatically download once the package is generated.

2. Upload the Adobe Creative Cloud ZIP package to your Custom Tag Approval and configure the required silent install parameter:
--silentYour Custom Tag Approval configuration should look similar to the following:

Keep in mind that Adobe packages can be large, which may increase upload time depending on your network connection.3. Save the approval and inspect your hosts.
Important Notes
- You can include multiple Adobe applications in your custom deployment ZIP.
- Patching will only occur when a new version of Adobe Creative Cloud is detected.
For Custom Software deployment of Adobe Creative Cloud, see:
https://vulndetect.org/topic/2385/adobe-creative-cloud-install-upgrade -
OneDrive Patch: Why SecTeer’s Recommended Version Is "old"
SecTeer VulnDetect recommends an "old" patch for OneDrive e.g. 25.184.921.4 (at the time of writing) as the latest available/recommended patch because this is the version that Microsoft makes available on their official download channels.
https://www.microsoft.com/en-us/microsoft-365/onedrive/downloadSome hosts already show a higher installed version, e.g. 25.206.1021.3.

That can look a bit odd because the “recommended” version may appear lower than what you already have. This is happening because the OneDrive client will auto-update itself shortly after.SecTeer will continue to show e.g. 25.184.921.4 as the latest available patch until Microsoft publishes a newer build as the default downloadable installer. The same is the case for certain other Microsoft products such as 365 Apps and Edge too, where Microsoft tend to release some undocumented pre-release versions or at least versions that aren't available for download via the usual official sources.
We plan to release and maintain OneDrive patches as soon as a build is officially available for download.
-
CCleaner 7.x Installer Behavior Change Notice
Starting with the 7.x release, the new CCleaner installer now triggers a Windows UAC prompt even when executed from an elevated context (such as Administrator or SYSTEM).
To accommodate this, the patch will still be made available as Non-Silent and marked with a special indicator to alert users:
This indicator helps ensure that users are aware of the expected UAC prompt before enabling the approval.Additionally, the language parameter previously supported by SecTeer (based on Piriform’s official documentation) no longer functions as of version 7.x.
Our tests confirm that:- The /L=<languageCode> argument is ignored by the 7.x installer
- The installer now defaults to English, regardless of the parameter specified
This means that localized installations are no longer possible. The patch will revert the application interface back to English until the vendor restores multi-language support.
Thank you for your understanding.
-
Adobe Acrobat Printing Issue in Latest Release
We want to make you aware of a known issue affecting the latest Adobe Acrobat/Reader update (version 25.001.20744).
This release has introduced significant printing problems, which are impacting a wide range of users.Adobe has confirmed the root cause of the issue and is working on a fix, expected in an upcoming Quick Fix Engineering (QFE) release. You can follow the official discussion here:
https://community.adobe.com/t5/acrobat-reader-discussions/failure-to-print-since-update-to-2025-001-20744/m-p/15524749Recommendation
Until Adobe provides a patch, we recommend avoiding the latest update and continuing with the previous stable version instead.
SecTeer has already adjusted the patching mechanism so this recommendation is automatically applied.We have tested downgrading directly from version 25.001.20744 using the prior MSP package. Unfortunately, this method does not successfully roll back the update.
The only reliable method is to uninstall the current version, reinstall the previous stable version, and then disable automatic updates until Adobe publishes a fix.
Thank you for your patience and understanding.
-
Zoom Workplace 32-bit going EoL on December 2025
Hi,
Due to Zoom phasing out support for Windows 32-bit by December 2025, all upgrades for 64-bit OS's will be done using the 64-bit installer.
For more details, please refer to the official vendor announcement:
https://support.zoom.com/hc/en/article?id=zm_kb&sysparm_article=KB0079569 -
reMarkable - Upgrade
1. Create a tag for all hosts with reMarkable installed
From the Applications page, click on the result under the Installations column to view hosts with reMarkable (prior releases) installed and use the
Manage Tags for Selected Hostsbutton to create the new tag.


2. Uninstall Prior Versions
Using the Software Deployment feature, apply the reMarkable (prior releases) uninstall and reMarkable (latest) deployment jobs to the tagged hosts.

Additional inspections might be required for the job to fully complete. -
VLC EXE/MSI - how to "switch" installers
Note: VLC now ships the MSI again, we have re-enabled support for updating MSI based installations. The below is kept for those who wants to change installers, as well as an example of how to do similar things for other applications.
Hi,
If you're experiencing issues with VLC not updating, this may be because the vendor stopped creating MSI installers as of version (3.21). We rely on official vendor installers and will update our package as soon as the MSI becomes available.
You can follow the official discussion thread here for more details:
https://forum.videolan.org/viewtopic.php?f=14&t=164735&p=544928&hilit=msi#p544928To help differentiate between installer types, we've updated VLC's title to clearly indicate whether it's an MSI or EXE installer:
VLC media player (EXE) VLC media player (MSI)To switch your MSI installation to the EXE version, use the Software Deployment feature to create a combined job that removes the MSI and deploys the EXE version simultaneously:

-
QGIS - Upgrade
When deploying the latest installer, QGIS does not replace the previous version. Instead, it installs alongside the existing version, resulting in a side-by-side installation.
In order to accommodate this caveat, we have the following workaround:
1. Create a tag for all hosts with QGIS installed
From the Applications page, click on the result under the Installations column to view hosts with QGIS (prior releases) installed and use the
Manage Tags for Selected Hostsbutton to create the new tag.

2. Uninstall Prior Versions
Using the Software Deployment feature, apply the QGIS (prior releases) uninstall and QGIS (latest) deployment jobs to the tagged hosts.

Additional inspections might be required for the job to fully complete.

Note:
Alternatively, using two separate jobs (one for uninstall and one for installation) is also possible, though keep in mind that the uninstall job would then run only once and need reactivation if required again. Therefore, we suggest using a combined job to remove and deploy QGIS versions simultaneously, as this is the smart, automated approach.
-
R for Windows - Upgrade
When deploying the latest installer, R for Windows does not replace the previous version. Instead, it installs alongside the existing version, resulting in a side-by-side installation.
In order to accommodate this caveat, we have the following workaround:
1. Create a tag for all hosts with R for Windows installed
From the Applications page, click on the result under the Installations column to view hosts with R for Windows installed

Use the
Manage Tags for Selected Hostsbutton to create the new tag.2. Uninstall Prior Versions
Using the Software Deployment feature, create a job that applies the R for Windows (prior releases) uninstall job and deploys the R for Windows (latest) job to the tagged hosts.
You can choose to do this on every update by setting the Job Options to "Install or uninstall once" (non-persistent), or use the "Always install or uninstall" which should ensure that it gets updated automatically as long as Tags are assigned correctly.

3. Inspect the tagged hosts in order to get immediate results, else the job will apply on the next scheduled inspection.
On the Tags page, click under the Hosts column to view and inspect the hosts associated with each tag.

Note: Some hosts might require a second inspection in order to complete the upgrade.
-
TeamViewer QuickSupport removal
TeamViewer QuickSupport is a portable app that cannot be supported for patching.
As portable applications do not install, there is no automatic process to delete them, unlike traditional applications that have registry information and provide a silent uninstallString, therefore, portable applications can only be deleted and not uninstalled.
This script removes TeamViewer QuickSupport.
It should be noted that deleting files in the SYSTEM context recursively into areas controlled by users is considered bad practice, we have tried to compensate for this by checking if the file is a symbolic link, before removing it.# Define the paths to search and the file names to delete $rootPath = "C:\" $filesToDelete = @("TeamViewerQS.exe", "TeamViewerQS_x64.exe") # Function to safely delete files without following symlinks function Remove-File { param ( [string]$Path, [string[]]$Files ) # Get all directories and files in the specified path $items = Get-ChildItem -Path $Path -Recurse -Force -ErrorAction SilentlyContinue foreach ($item in $items) { # Skip if the item is a symlink if ($item.Attributes -band [System.IO.FileAttributes]::ReparsePoint) { Write-Output "Skipping symlink: $($item.FullName)" continue } # Check if the item is one of the files to delete if ($Files -contains $item.Name) { try { Remove-Item -Path $item.FullName -Force -ErrorAction Stop Write-Output "Deleted: $($item.FullName)" } catch { Write-Error "Failed to delete: $($item.FullName) - $_" } } } } # Call the function to remove the files Remove-File -Path $rootPath -Files $filesToDeleteCustom Software Configuration:

-
Install AutoCAD LT
It is possible to deploy AutoCAD LT with Custom Software.
The Custom Deployment Configuration should be the following:

The AutoCADLT.zip that is seen in the configuration is a modified ZIP. Please see the following screenshot on how to create it:

installer.exe and Collection.xml have been left out as this would allow customization without generating a new ZIP file.After the task has been completed, we confirm seeing the following installed in the Autodesk folder on the target hosts:
AdODIS
AdskIdentitManager
AutoCAD Activity Insights
AutoCAD LT 2024
Genuine Service -
FortClient VPN - Install, Upgrade
You may be able to use the Custom Software feature to assist you with FortiClient VPN-only.
Please be mindful when deploying FortiClient over existing installations as there may be conflicts. To find out more about the upgrade paths check the URL below:
https://docs.fortinet.com/document/forticlient/7.2.0/upgrade-pathHowever, there is a number of different ways in which FortiClient can be configured during distribution, thus we can't predict if the approach you decide upon is compatible with the functionality currently provided in Custom Software.
We did make Proof-of-Concept deployments of Foxit products using MST files.
https://vulndetect.org/topic/2382/vulndetect-custom-software-upgrading-foxit-phantompdf-to-foxit-pdf-editorThe documents for FortiClient suggests that it also supports MST files.
It also suggests that XML files can be used.
Please see the full docs here:
https://docs.fortinet.com/document/forticlient/6.0.0/configurator-tool/343622/forticlient-configurator-tool
https://docs.fortinet.com/document/forticlient/6.0.0/configurator-tool/754658/deploying-forticlient-windows-installation-packagesQuote: "Starting with FortiClient 5.6.0, an account for the Fortinet Developer Network is required to access the free tool. No license key is required to use the tool."
This indicates that you need to login to the Fortinet portal to find the latest tool and possibly documentation, the above links refer to 6.0.0, however, FortiClient is currently at 7.2.x.
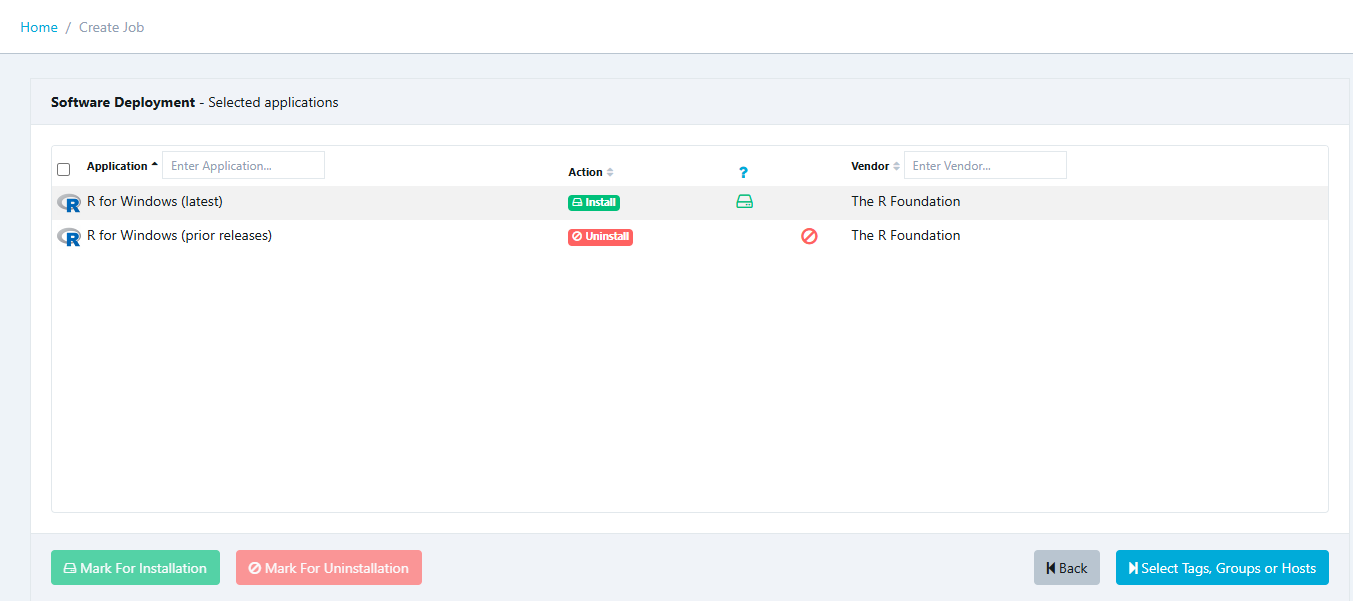
We suggest that you configure FortiClient as required, based on the vendors guidelines, and test it using Custom Software.
If for some reason it fails using Custom Software, but works with local tests, please provide us access to the files you created, and we will test this and help with adjusting any parameters supplied to the installer through Custom Software.
Note that the files you share with us most likely will contain some sort of credentials and license information. We will naturally delete any sensitive files after testing and documenting our findings.
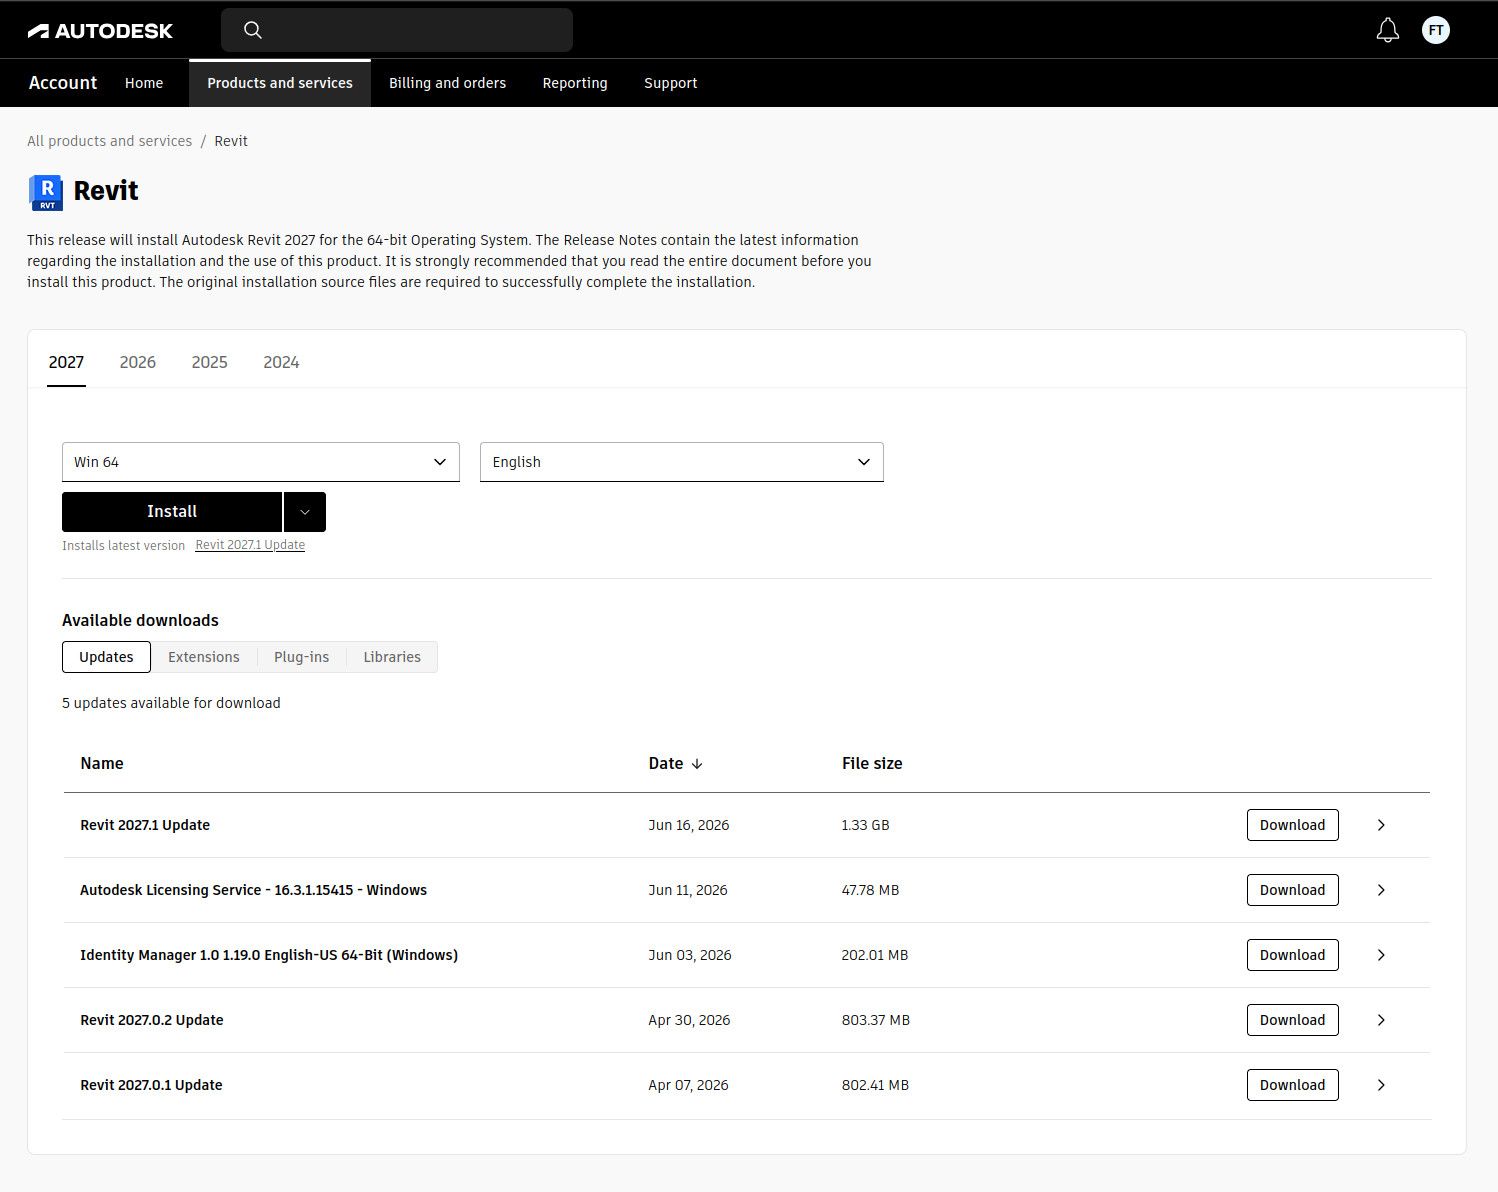
You can find the latest installer here:
https://www.fortinet.com/support/product-downloads#vpn
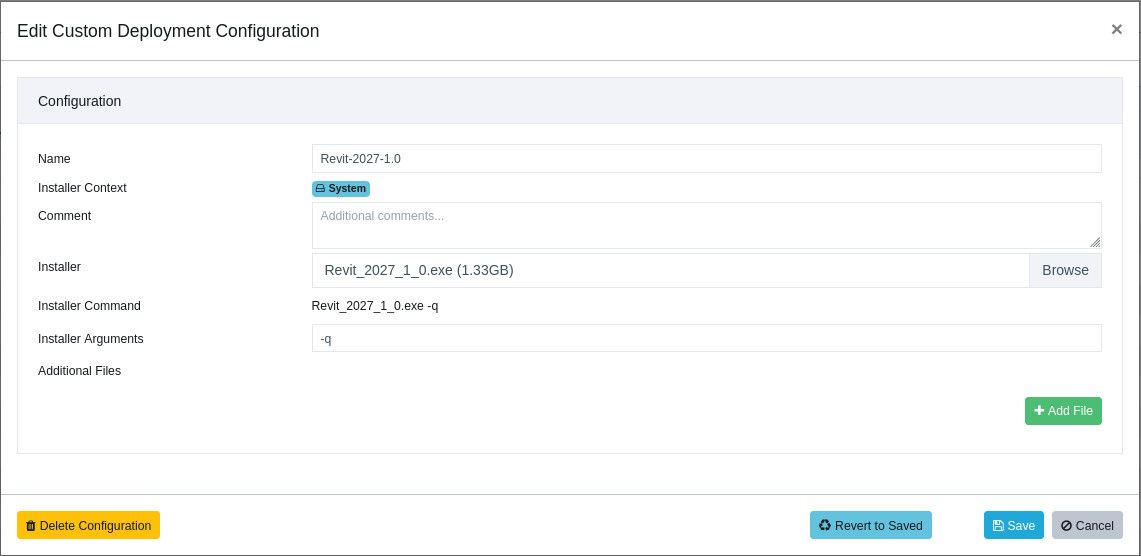
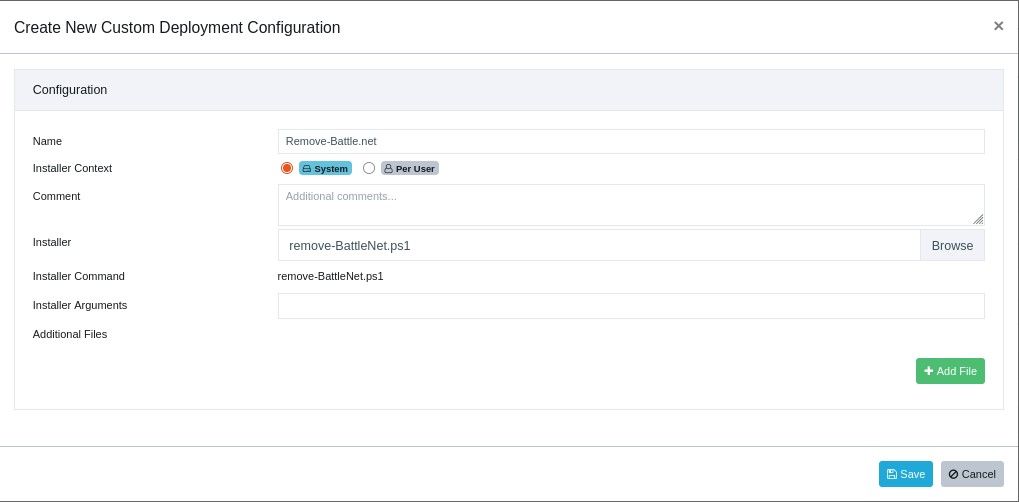
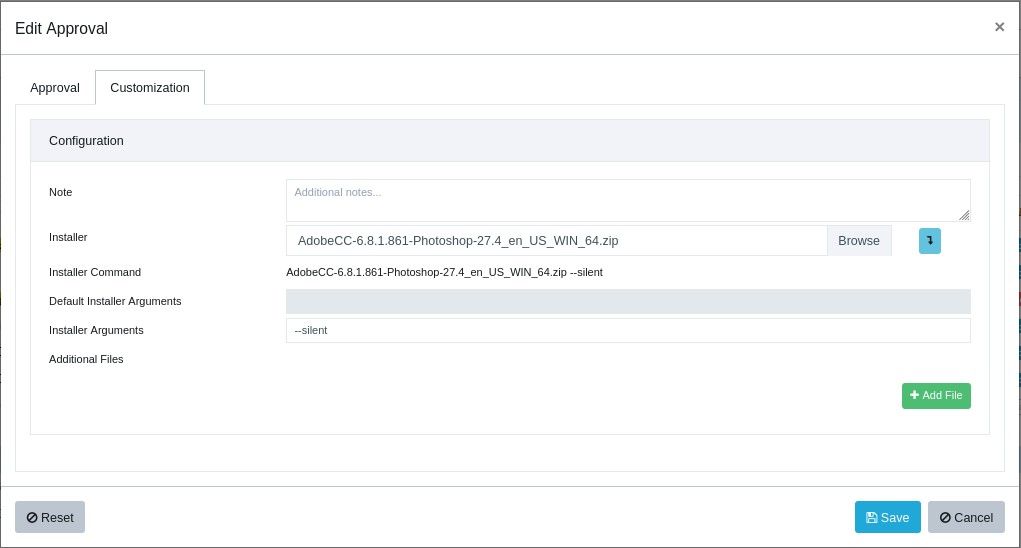
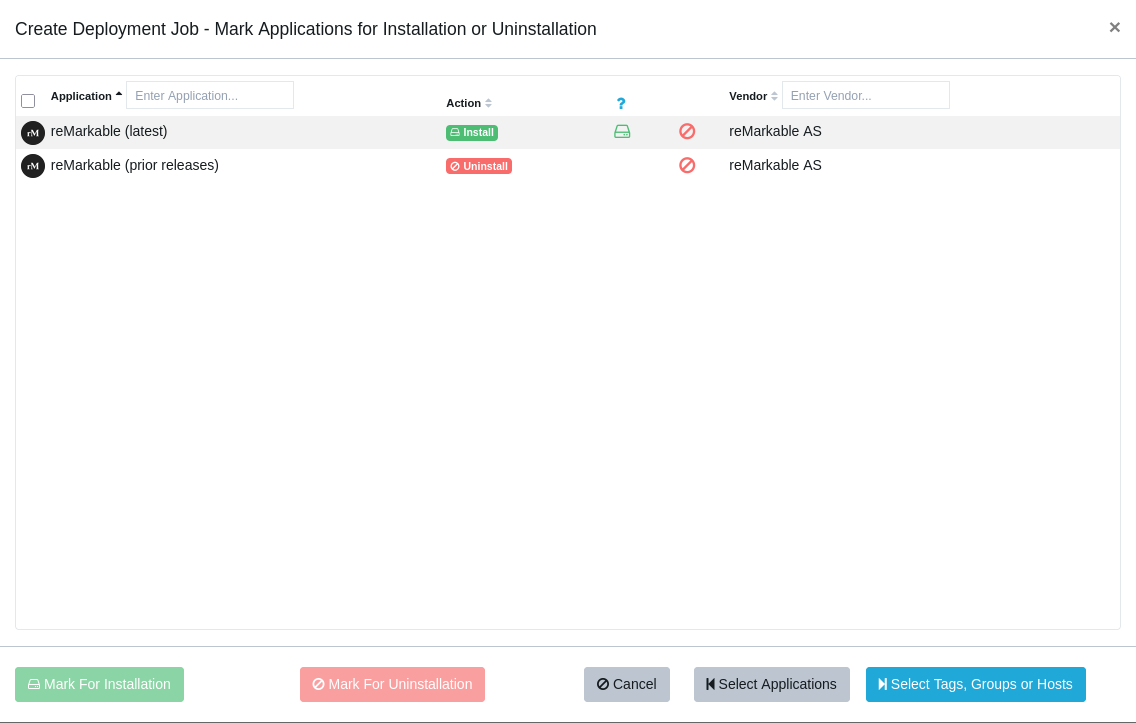
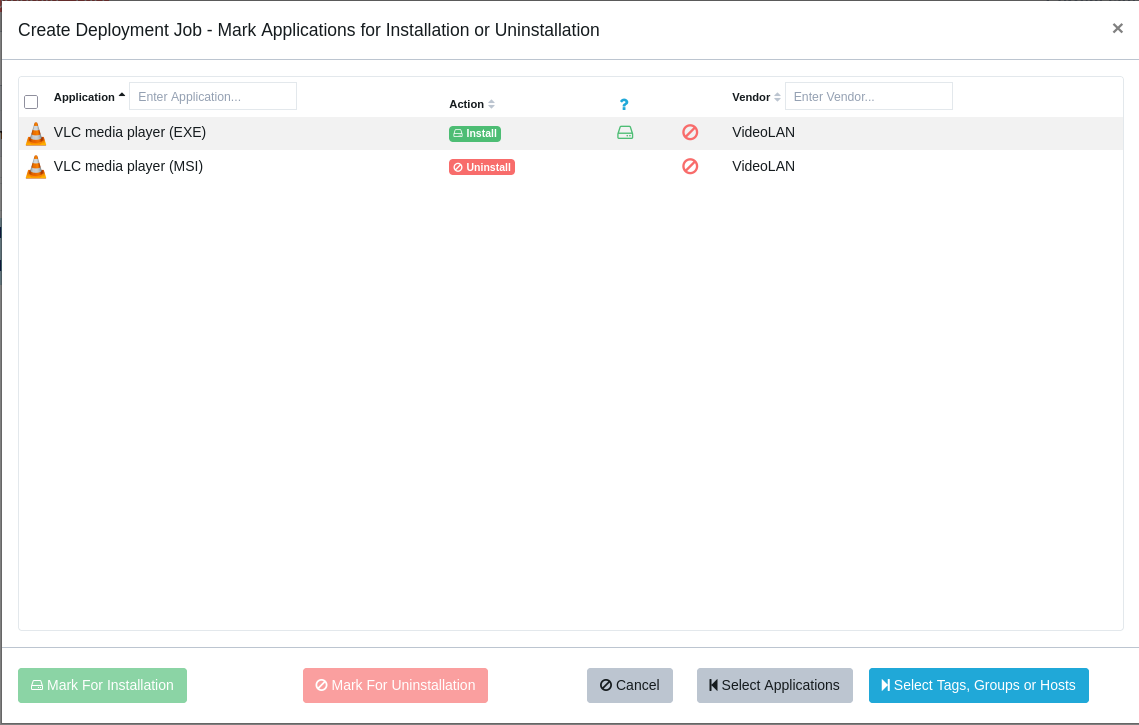
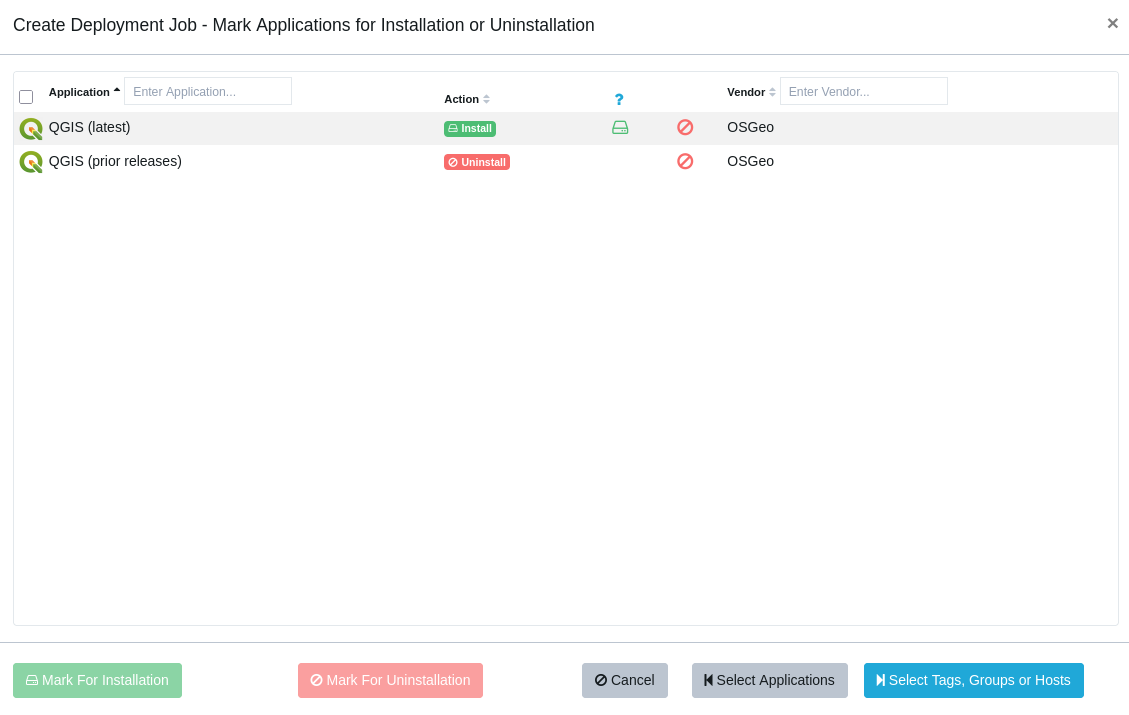
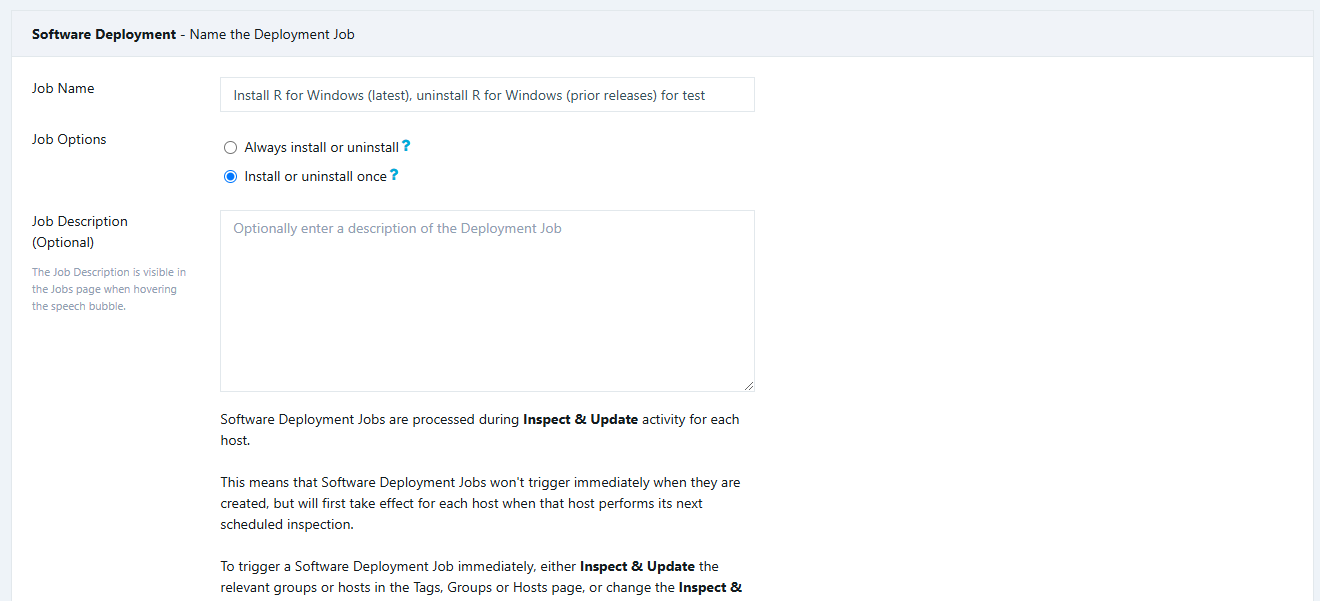
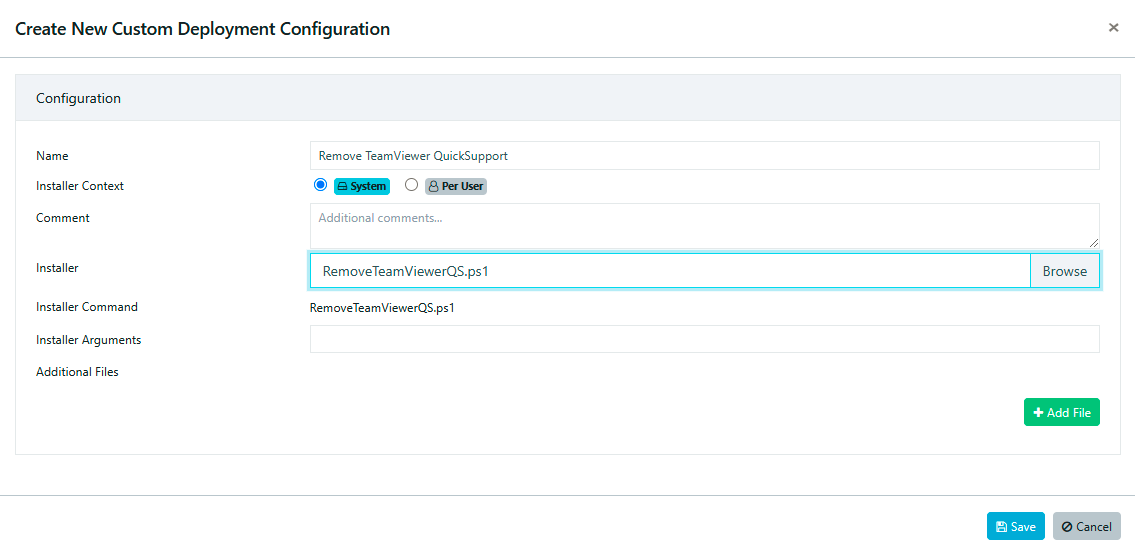
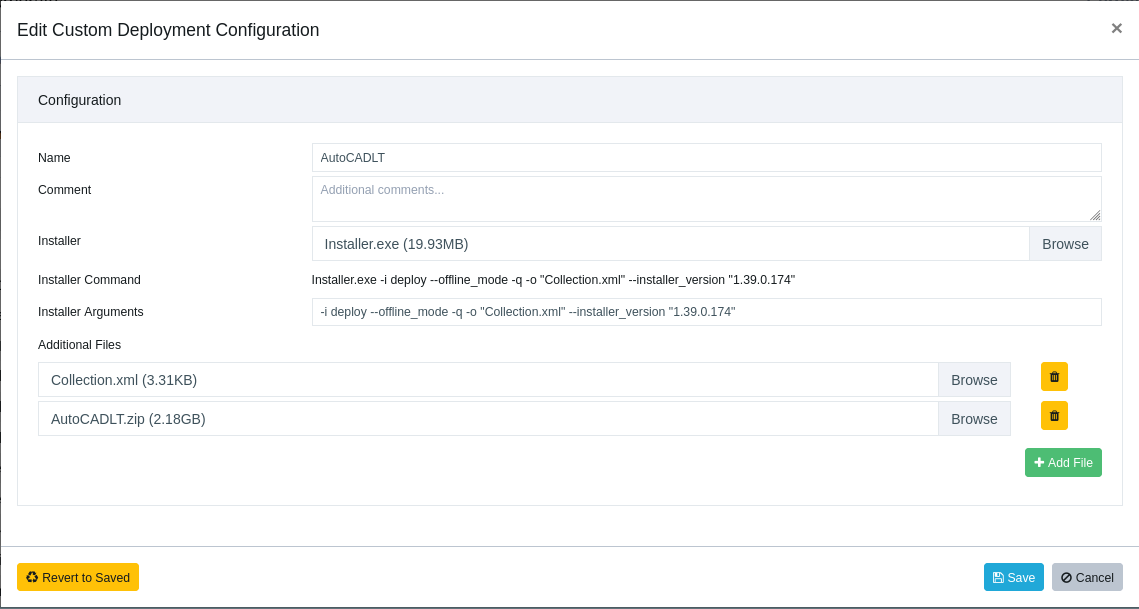
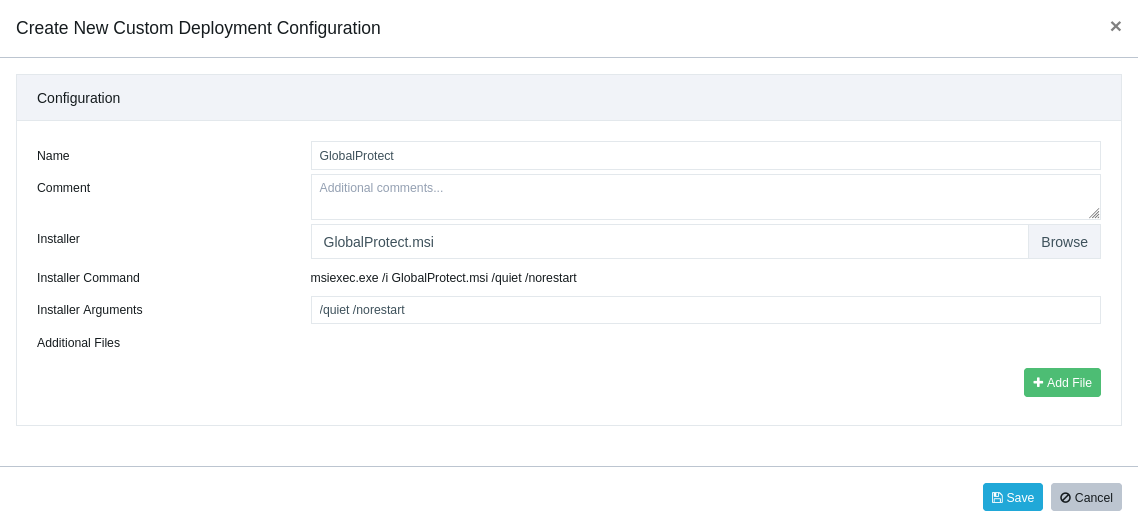
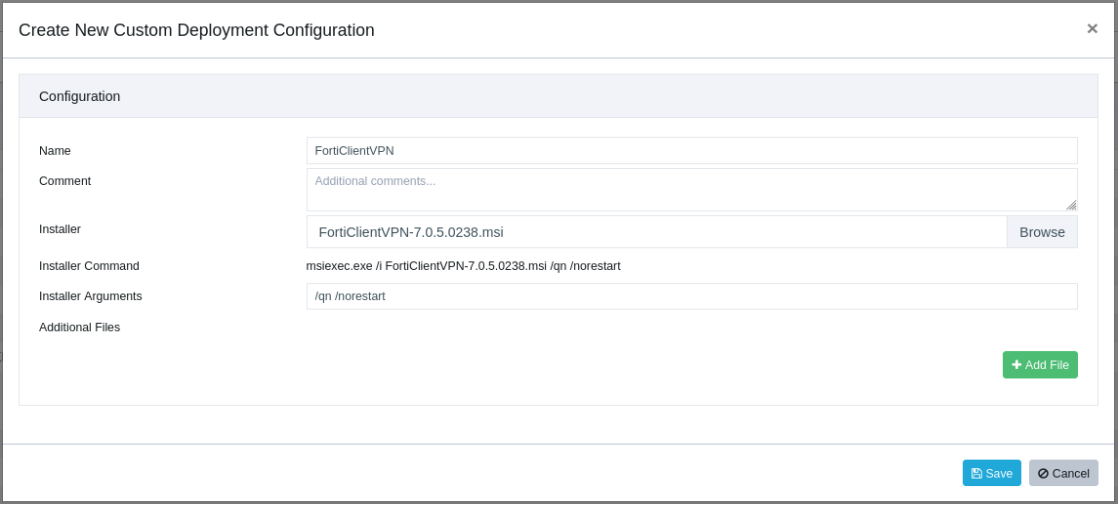
A simple Custom Software configuration should look like this:

-
Enter a title e.g. "
FortiClientVPN" -
Select the installer:
FortiClientVPN-7.0.5.0238.msi -
Enter the silent Argument:
/qn -
Enter the never restart option Argument:
/norestart
And then click "Save".
The dialogue will now upload the files to the VulnDetect back-end.
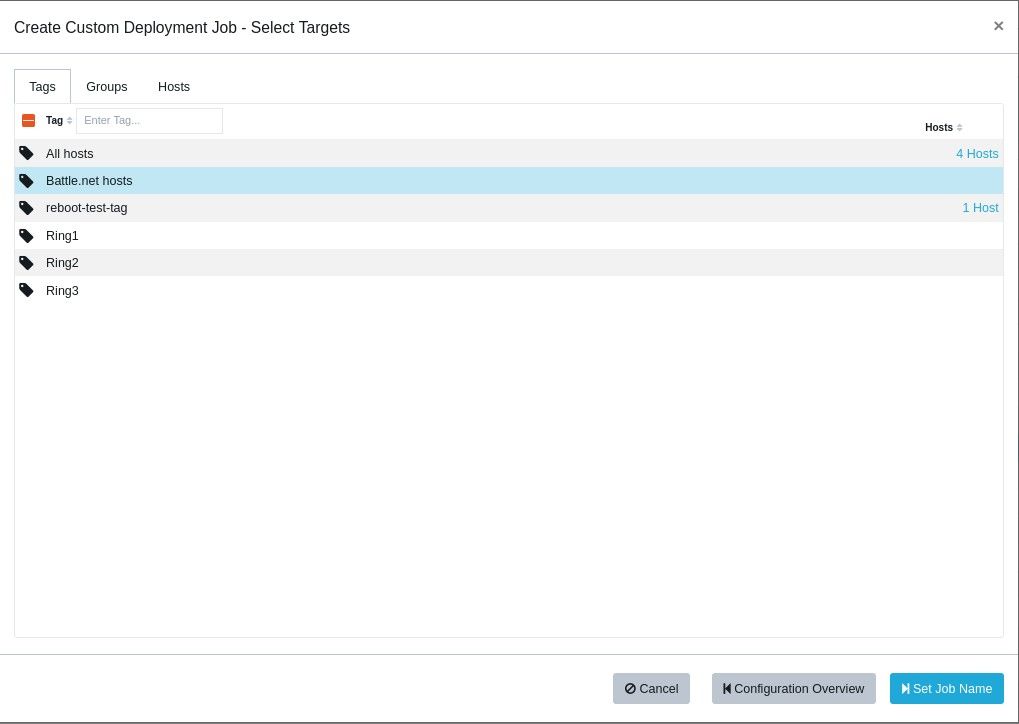
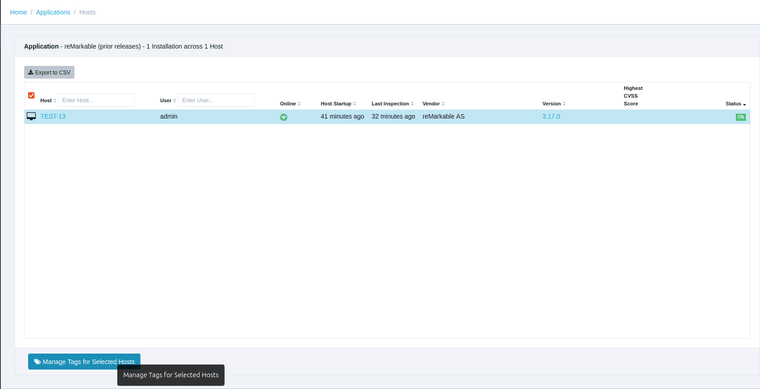
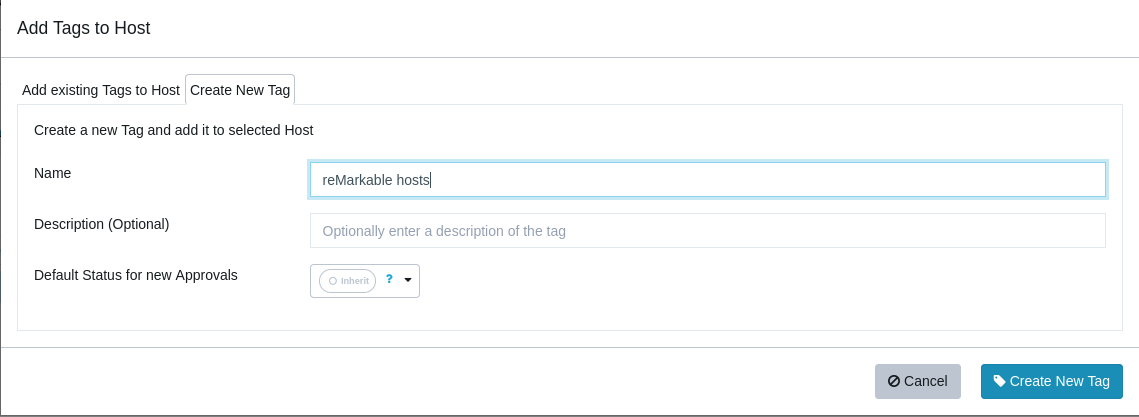
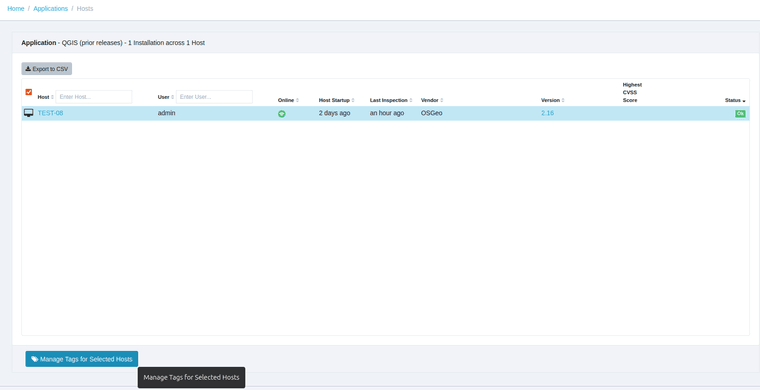
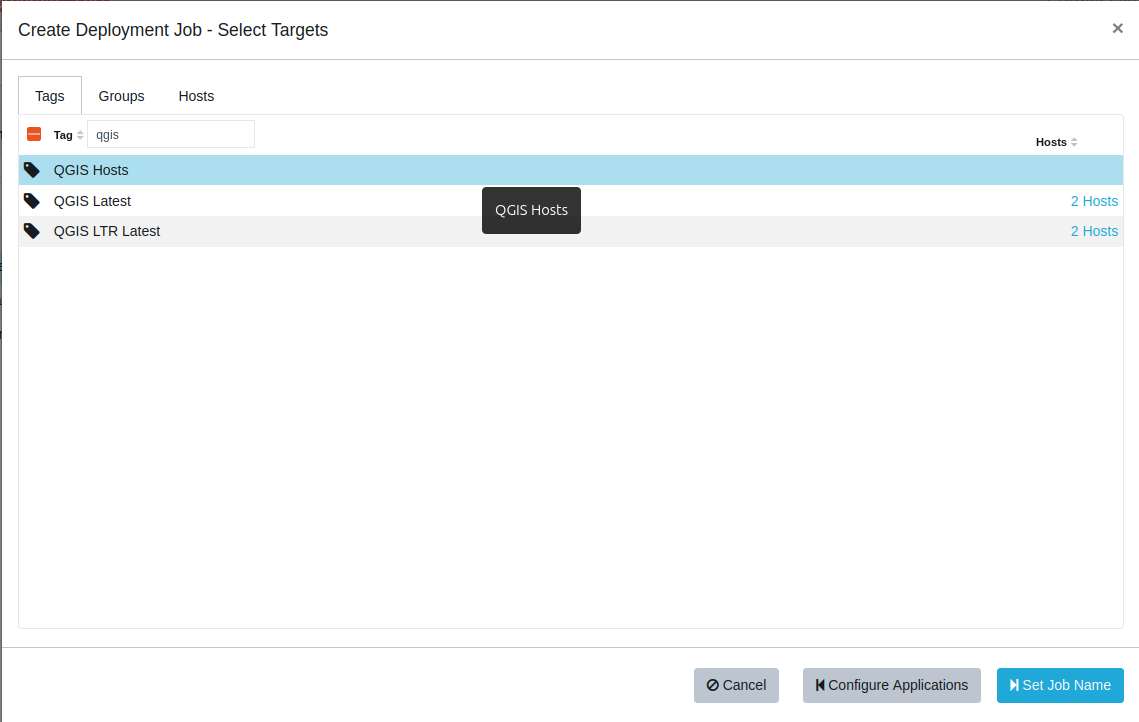
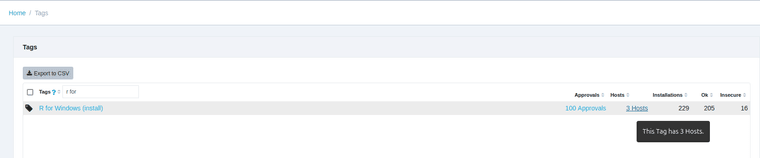
After saving the Job, you can now select to deploy it to groups or hosts.
Remember to inspect the host or group, if you want the job to run right away, else it'll apply after the next scheduled inspection. -
-
Snagit Uninstaller Tool (manage old annual releases)
You can use the Snagit Uninstaller Tool with Custom Software in order uninstall specific or all versions of Snagit.
Please read the official documentation here:
https://support.techsmith.com/hc/en-us/articles/360022581532-Snagit-Windows-Use-the-UninstallerTool-exe-as-Command-Line-Tool- Start by creating your new Custom Software here:
https://corporate.vulndetect.com/#/deployment/custom-create-job

The arguments used will keep the 2023 version and uninstall all the previous yearly releases.
Parameters
- -product <insert product_name> - Remove all versions of Snagit.
UninstallerTool.exe -product snagit- -keep <insert comma-separated version list> - Remove all versions of Snagit except specific versions.
UninstallerTool.exe -product snagit -keep 23,22- -remove <insert comma-separated version list> - Remove only specific versions of Snagit.
UninstallerTool.exe -product snagit -remove 20,21 - Start by creating your new Custom Software here:
-
Palo Alto Networks GlobalProtect - Install, Upgrade
The installer(s) of GlobalProtect are not publicly available for download. You will need to acquire them through the GlobalProtect portal as stated in the official documentation from the vendor's website.
You can read the full article here:
https://docs.paloaltonetworks.com/globalprotect/6-1/globalprotect-app-user-guide/globalprotect-app-for-windows/download-and-install-the-globalprotect-app-for-windowsOnce you have acquired the installer, you can upload it to VulnDetect using the Custom Software feature, use the documented silent parameters and run the inspection on the Hosts you have deployed the Custom Software job.

Additionally, the installer can be configured with the following arguments:
- configure the portal address
/quiet /norestart PORTAL=”portal.acme.com”- prevent users from connecting to the portal if the certificate is not valid
/quiet /norestart CANCONTINUEIFPORTALCERTINVALID=”no” -
CodeMeter Runtime - Install, Upgrade
CodeMeter Runtime can be deployed/updated using the Custom Software feature in VulnDetect - Corporate:
You can download official installers from here:
https://www.wibu.com/us/support/developer/downloads-developer-software.html
We have used the CodeMeter Runtime Kit for Distribution x64 MSI installer for our tests.

Upload the MSI and insert the following silent arguments: /qn /norestart

You are now ready to deploy or upgrade CodeMeter Runtime. -
OpenVPN - Install, Upgrade
OpenVPN can be deployed/updated using the Custom Software feature in VulnDetect - Corporate:
Note: Updating has worked on our internal systems without an active VPN configuration. We expect that the update will kill active VPN connections.
You can download official installers from here:
https://openvpn.net/community-downloads/Upload the installer and insert the following silent arguments: /qn /norestart

You are now ready to deploy or upgrade OpenVPN. -
AnyConnect - Install, Upgrade
AnyConnect can be deployed/updated using the Custom Software feature in VulnDetect - Corporate:
Note: Updating has worked on our internal systems without an active VPN configuration. We expect that the update will kill active VPN connections.
You can download official installers from here:
https://www.cisco.com/c/en/us/support/security/anyconnect-secure-mobility-client-v4-x/model.html#~tab-downloadsUpload the installer and insert the following silent arguments: /qn /norestart

You are now ready to deploy or upgrade AnyConnect.